Carpenter
The carpenter class is able to create furniture, weapons, and other items made from wood.
Basic Commands
Carpenters are able to craft items from wood.
The standard crafting command syntax is: [verb] [material] into [item]
The crafting verb for wood is carve. You will need some lumber and a carving knife.
Ex: carve lumber into bench
You can see a full list of items available to you at your skill level in the @craft menu under “Carving.”
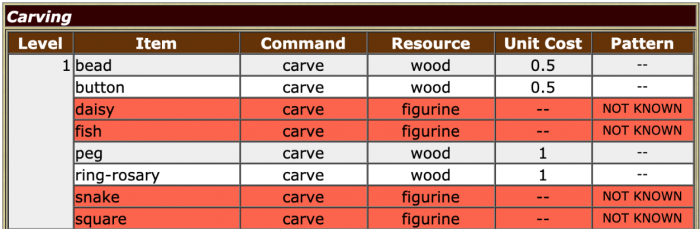
Level: This is the minimum skill level necessary to craft the item.
Command: This is the command you will put in the [verb] slot to create the item.
Resource: This is the base you will need to create the item. Items with “wood” for the resource are crafted from lumber. Items with anything else for the resource (ex: “figurine”) are crafted from that base item rather than directly from the lumber.
Unit Cost: This is how much lumber in cords (standard lumber has 10 cords) you will need to create the item. To see how much lumber you have left, examine the lumber. Items which are made from base items, such as a figurine, will not have a unit cost.
Pattern: With each level in carpenter, you will acquire the ability to make four items, i.e. patterns, for free. You will also gain access to other items that you will have to learn separately. These items will be marked as “NOT KNOWN” and shown in red until you learn the pattern. (See: Advanced Commands: Learning New Items)
You can also see a full list which items you can craft from lumber by omitting the into [item] portion of the command.
Ex: carve lumber
Valid options are: “arm splint” “armoire” “backscratcher” “bangle” “bar” “basin” “bead” “bed” “bench” “bookshelf”
Note: The list of options will vary based on skill level. The list may be empty if your skill level is not high enough.
You can carve some items a second time into more specific items. The command syntax is the same. As with the original items, you can see a list of options by omitting the into [item] portion of the command. Likewise, the available options will vary by skill level or may be empty.
Ex: carve figurine
Valid options are: “daisy” “fish” “snake” “square”
Ex: carve figurine into daisy
Note: The final quality of the item is based on your skill level and the quality of the original lumber used. Because the skill level aspect of this calculation is handled with a (virtual) die roll, there may be some variation in the final quality even when crafting from the same lumber.
Advanced Commands
Maker’s Marks
Carpenters can put a maker’s mark on their items using the brand command.
Ex: brand bench
A maker’s mark, if present on an item, can be seen when you examine the item.
You examine your maple bench.
A maple bench. Simple in design, this low maple bench has narrow legs and a wide seat.
– A small maker’s mark indicates that this item was crafted by Kjell.
The maple bench appears to be of outstanding quality.
Engraving
Carpenters can add engravings to their items. You will gain access to more engraving options at each level.
The engraving command syntax is: [verb] [item] ‘[pattern]
The command for items crafted from wood is engrave. You will need a carving knife.
Ex: engrave bench ‘rose
To see a list of engraving options available for an item, omit the ‘[pattern] portion of the command.
Ex: engrave bench
Engrave Kjell’s maple bench ‘PATTERN
Your pattern options are: noneanchor, apple blossom, arabesque, autumn leaf, bud, butterfly, celestial, circle, claw, cloud
You can also do a custom engraving using the syntax: engrave my item ‘custom’.
As noted at the bottom of the options list, you can create custom engravings by putting custom for the [pattern].
Ex: engrave bench ‘custom
A separate pop-up window will appear for custom engravings (check your browser’s pop-up settings if this does not happen). The length of the custom engraving is determined by your skill level, i.e. carpenters with a higher skill level can write longer custom engravings.
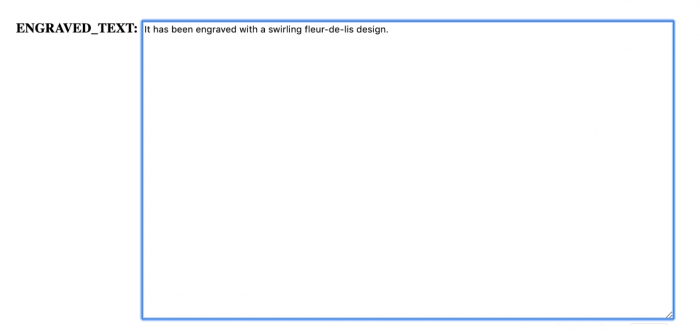
Enter your engraving into the text box and click the Finish button below.
The formatting for engravings is entirely freeform, and the full sentence will appear as written after the base description of the item.
Ex:
You look at your engraved maple bench.
A maple bench. It has been engraved with a swirling fleur-de-lis design.
Check your custom submission for errors and be mindful of the period at the end before clicking the Finish button. Once an item has been engraved, you will not be able to make any changes to the engraving.
Please note that there are rules associated with custom submissions across all crafts:
- Submissions can have magical/supernatural themes but cannot be magical/supernatural themselves (ie. a painting of a figure that moves around the canvas).
- Vulgar/sexually explicit material is forbidden–if the content is not acceptable for a minor, do not submit it! When in doubt, contact staff.
- Avoid phrasing that forces the viewer to think or feel a certain way (ie ‘this painting is so beautiful you can’t help but cry’).
- Do not reference details of the canvas that do not actually exist, such as a frame.
- I understand if I violate these rules, access to this command will be revoked.
If you are unsure about whether or not your custom submission will be in violation of these rules, @assist first. Staff reserves the right to edit or delete items in violation of one or more rules.
Learning New Items
With each new level in the carpenter class, you will gain access to four free items. They may be base items crafted from lumber or secondary items crafted from a base item. The remaining items that you gain access to at each level will require additional steps to learn. These items appear in red as “NOT KNOWN” in the @craft menu.
In order to learn to craft the unknown items, you must find a schematic for that item (note: both blacksmiths and carpenters use schematics; double-check before buying that you’re not buying a schematic for blacksmiths). Schematics are sold by NPCs throughout the game world. Some schematics are sold individually, and some schematics are sold together in folders or books.
Once you have acquired a schematic, folder, or book, you must study the individual schematic. Studying a schematic will cost learning points.
Ex: study ceiling planks schematic
If your schematic was sold as part of a folder, you can target the schematic while it is in the folder.
Ex: study folder’s settee schematic
You can see which schematics are in a folder when you look at or examine it.
look folder
You look at your bench embossed gray suede folder.
A gray suede folder, embossed with an image of bench upon its cover, which is designed to store patterns. It is labeled: “Benches”
It holds the following patterns: a wooden settle schematic, a settee schematic, a low-backed bench schematic, a day bed frame schematic, a chaise frame schematic, a storage bench schematic.
You can also remove the schematic from the folder using the pull command and put the schematic back into the folder using the place command.
Ex: pull settee schematic from folder
Ex: place settee schematic in folder
Books function like the folders, except you cannot remove schematics from the book or put schematics into the book.
Note: Studying from a schematic takes time, but you do not need to remain logged into the character to finish studying. Other players can see when you are studying from a schematic.
After you finish studying the schematic, the item will appear as “KNOWN” in the @craft menu, and you will be able to make it per the basic commands outlined above.
Combining Items
Carpenters can create some items that can (or must) be combined with others to create a final product, such as an upholstered bench. These final items will often require parts that must be acquired from other characters (ex: upholstery, arrowhead)
The command syntax for combining items is: add [item 1] to [item 2]
Ex: add upholstery to bench
The bench will now show the upholstery in addition to the wood bench crafted by the carpenter when you look at or examine it.
You look at your white cotton and maple bench.
A white cotton and maple bench. It has been engraved with a swirling fleur-de-lis design.
Note: Not all items can be combined to make a new final product, and some items will require additional parts to be completed. For example, a carpenter can create an arrow shaft that must be combined with an arrowhead to create a completed arrow. Alternatively, adding upholstery to a bench is optional.
